Trigger flows with the SkillFlaw API
After you build a flow, you probably want to run it within an application, such as a chatbot within a mobile app or website.
SkillFlaw provides several ways to run flows from external applications:
- Trigger flows with the SkillFlaw API
- Add an embedded chat widget to a website
- Serve flows through a SkillFlaw MCP server
- Run flows with the OpenAI Responses compatible endpoint
Although you can use these options with an isolated, local SkillFlaw instance, they are typically more valuable when you have deployed a SkillFlaw server or integrated SkillFlaw into a larger application architecture.
Use the SkillFlaw API to run flows
The SkillFlaw API is the primary way to access your flows and SkillFlaw servers programmatically.
For an example of a script that calls the SkillFlaw API, see the Quickstart.
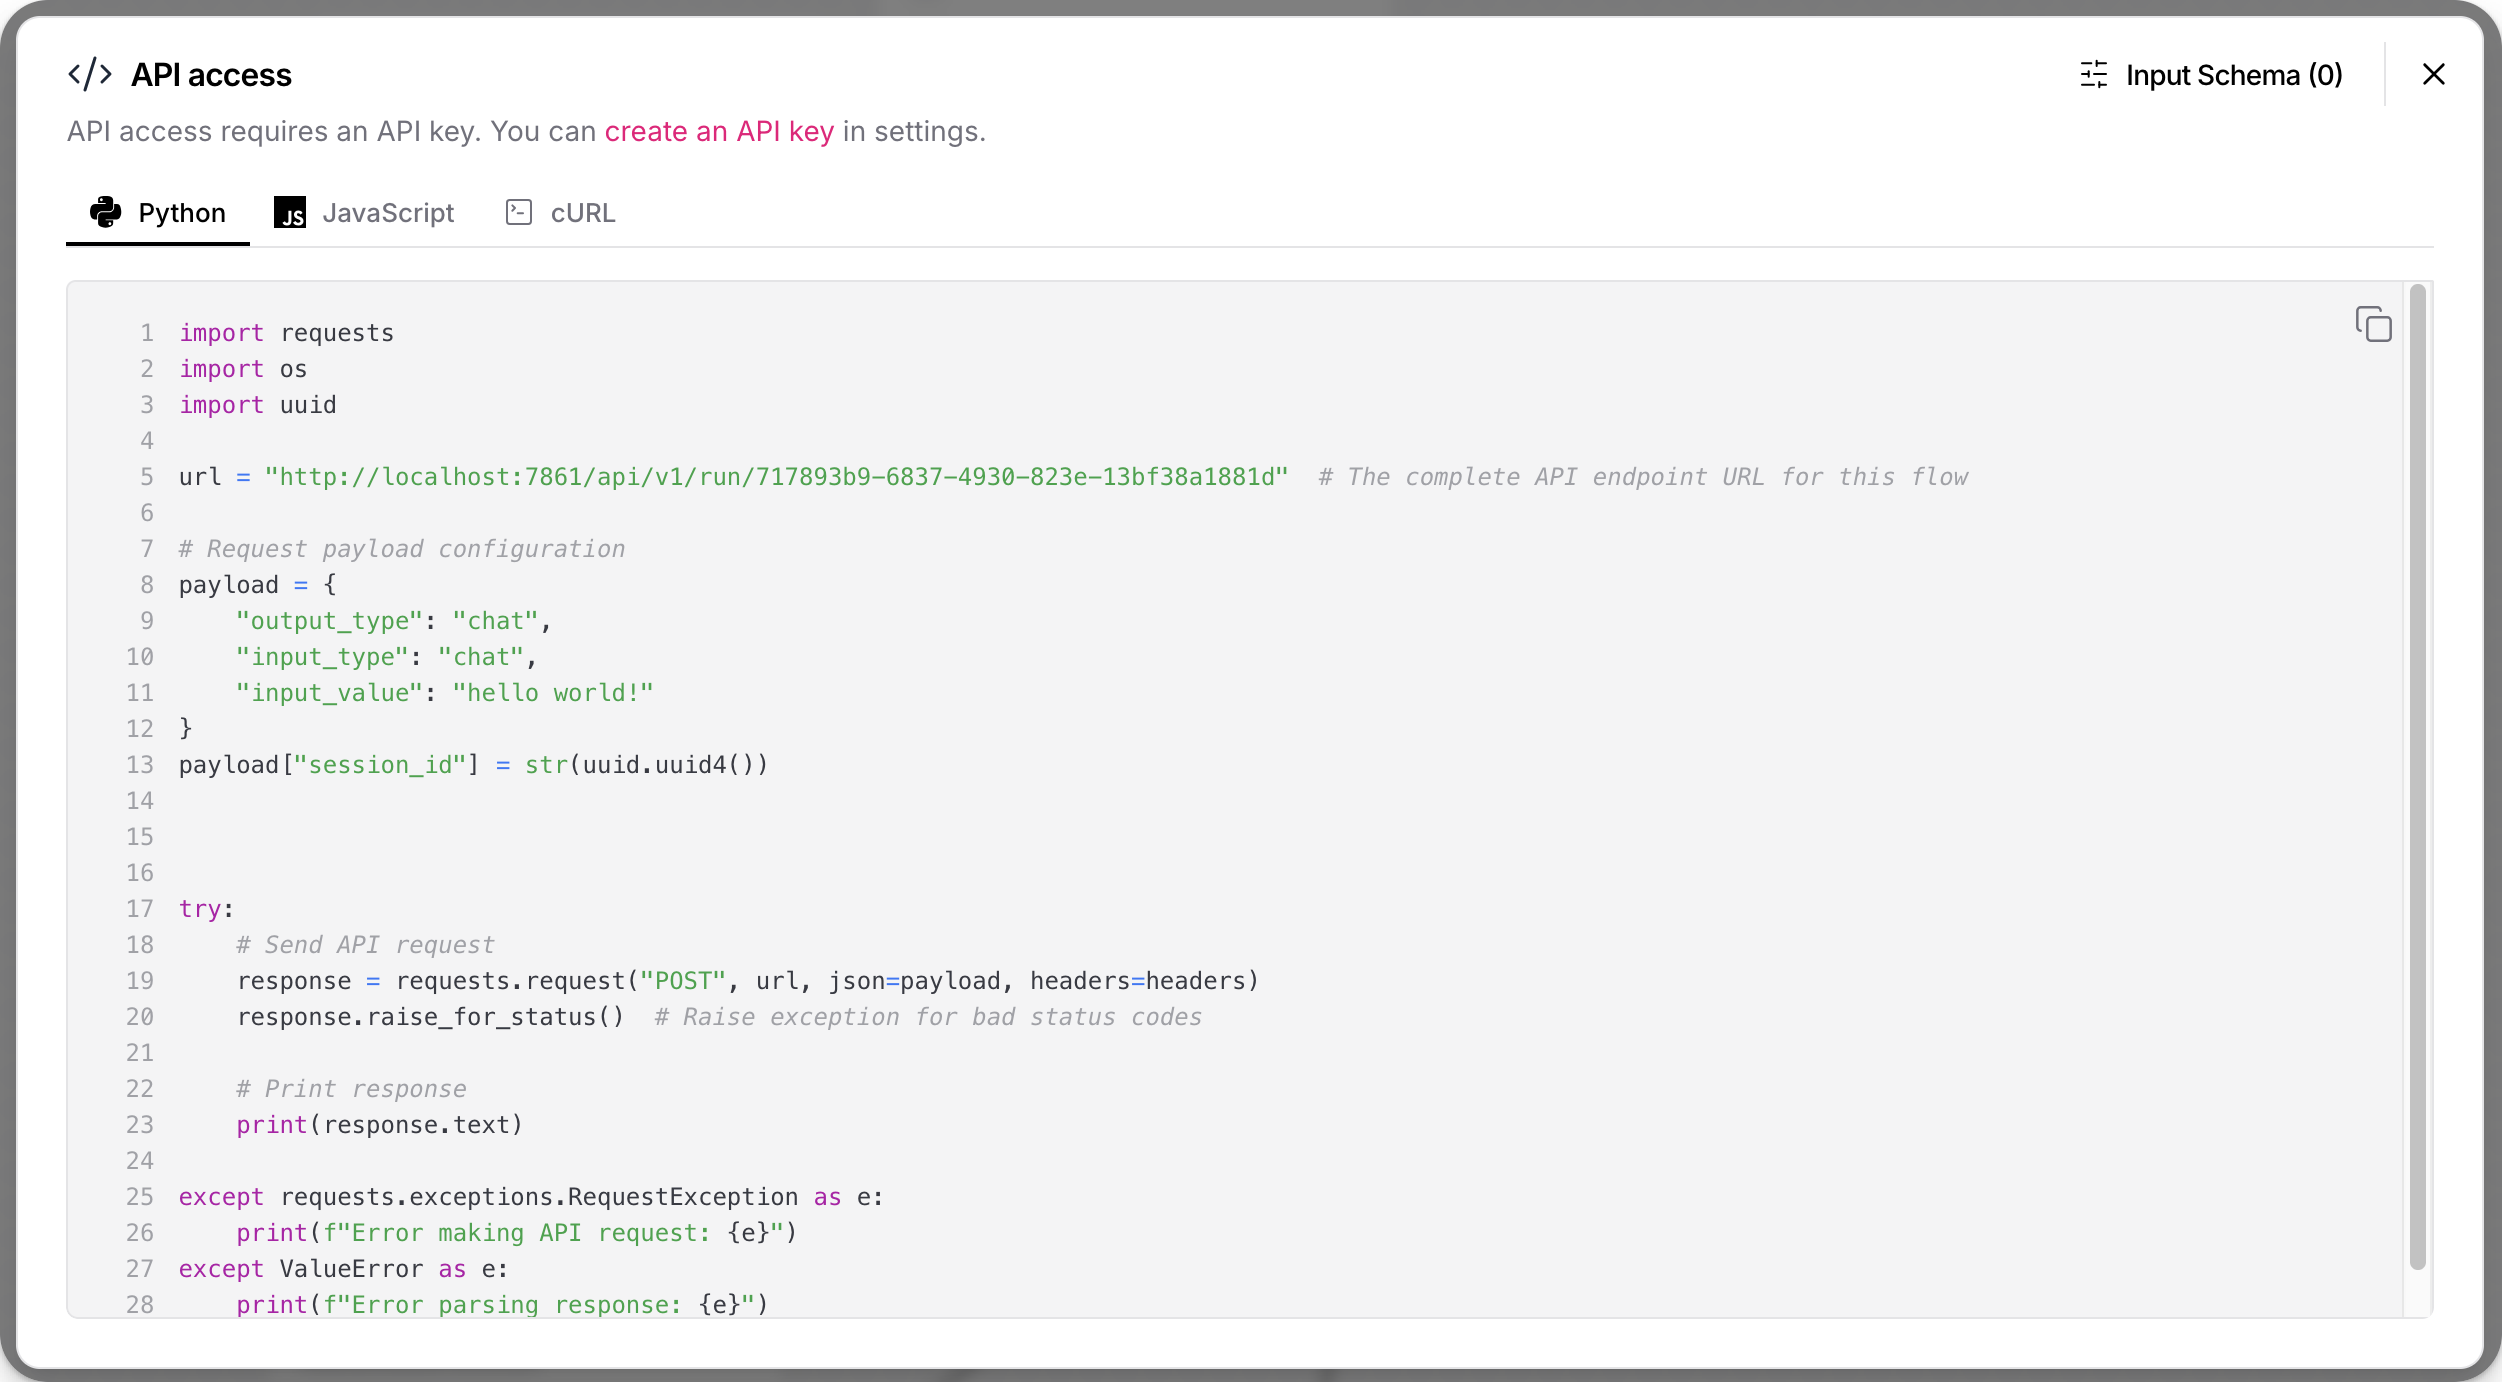
Generate API code snippets
To help you embed SkillFlaw API requests in your scripts, SkillFlaw automatically generates Python, JavaScript, and curl code snippets for your flows. To get these code snippets, do the following:
- In SkillFlaw, open the flow that you want to embed in your application.
- Click Share, and then select API access.
These code snippets call the /api/v1/run/$FLOW_ID endpoint, and they automatically populate minimum values, like the SkillFlaw server URL, flow ID, headers, and request parameters.
The paths generated by the API access pane assume a *nix environment. If you use Microsoft Windows or WSL, you might need to adjust the filepaths given in the code snippets.
-
Optional: Click Input Schema to modify component parameters in the code snippets without changing the flow itself.
-
Copy the snippet for the language that you want to use.
-
Run the snippet as is, or use the snippet in the context of a larger script.
For more information and examples of other SkillFlaw API endpoints, see Get started with the SkillFlaw API.
SkillFlaw API authentication
In SkillFlaw versions 1.5 and later, most API endpoints require authentication with a SkillFlaw API key.
Code snippets generated in the API access pane include a script that checks for a SKILLFLAW_API_KEY environment variable set in the local terminal session.
This script doesn't check for SkillFlaw API keys set anywhere besides the local terminal session.
For this script to work, you must set a SKILLFLAW_API_KEY variable in the terminal session where you intend to run the code snippet, such as export SKILLFLAW_API_KEY="sk...".
Alternatively, you can edit the code snippet to include an x-api-key header and ensure that the request can authenticate to the SkillFlaw API.
For more information, see API keys and authentication and Get started with the SkillFlaw API.
Input Schema (tweaks)
Tweaks are one-time overrides that modify component parameters at runtime, rather than permanently modifying the flow itself. For an example of tweaks in a script, see the Quickstart.
Tweaks make your flows more dynamic and reusable.
You can create one flow and use it for multiple applications by passing application-specific tweaks in each application's SkillFlaw API requests.
In the API access pane, click Input Schema to add tweaks to the request payload in a flow's code snippets.
Changes to a flow's Input Schema are saved exclusively as tweaks for that flow's API access code snippets. These tweaks don't change the flow parameters set in the workspace, and they don't apply to other flows.
Adding tweaks through the Input Schema can help you troubleshoot formatting issues with tweaks that you manually added to SkillFlaw API requests.
For example, the following curl command includes a tweak that disables the Store Messages setting in a flow's Chat Input component:
_14curl --request POST \_14 --url "http://SKILLFLAW_SERVER_ADDRESS/api/v1/run/FLOW_ID" \_14 --header "Content-Type: application/json" \_14 --header "x-api-key: SKILLFLAW_API_KEY" \_14 --data '{_14 "input_value": "Text to input to the flow",_14 "output_type": "chat",_14 "input_type": "chat",_14 "tweaks": {_14 "ChatInput-4WKag": {_14 "should_store_message": false_14 }_14 }_14}'
Use a flow ID alias
If you want your requests to use an alias instead of the actual flow ID, you can rename the flow's /api/v1/run/$FLOW_ID endpoint:
-
In SkillFlaw, open the flow, click Share, and then select API access.
-
Click Input Schema.
-
In the Endpoint Name field, enter an alias for your flow's ID, such as a memorable, human-readable name.
The name can contain only letters, numbers, hyphens, and underscores, such as
flow-customer-database-agent. -
To save the change, close the Input Schema pane.
The automatically generated code snippets now use your new endpoint name instead of the original flow ID, such as url = "http://localhost:7860/api/v1/run/flow-customer-database-agent".
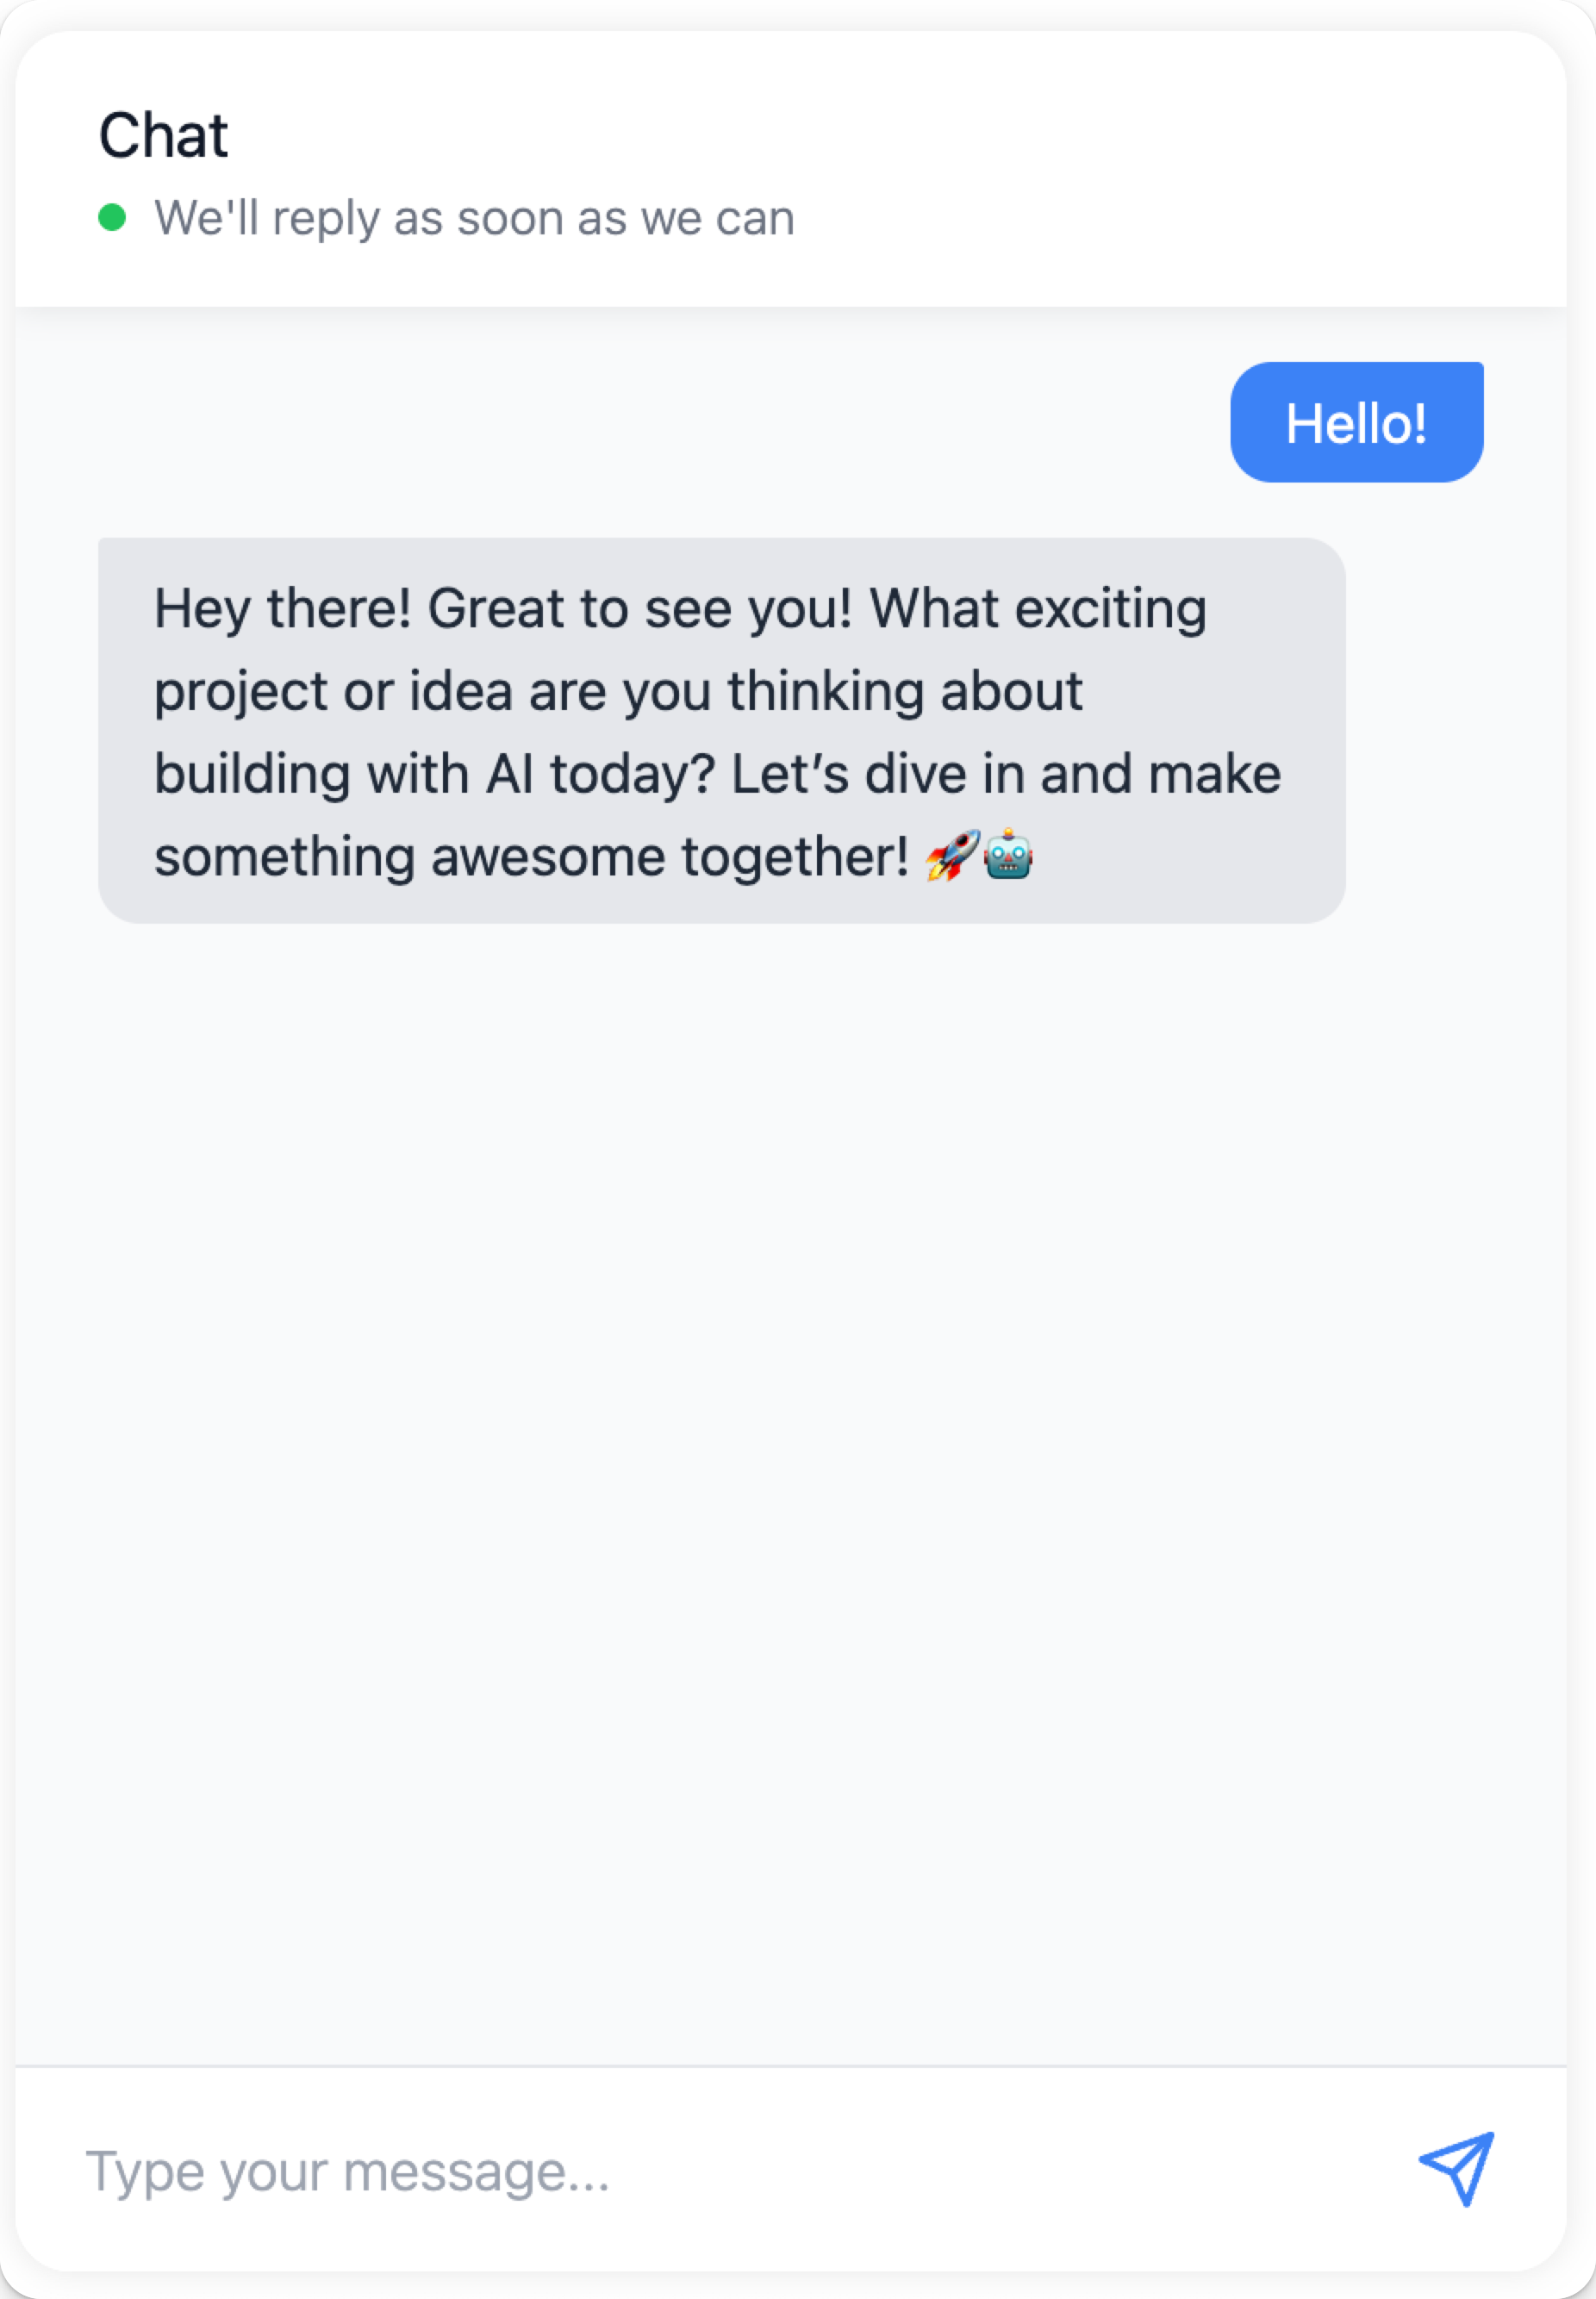
Embed a flow into a website
For each flow, SkillFlaw provides a code snippet that you can insert into the <body> of your website's HTML to interact with your flow through an embedded chat widget.
The chat widget only supports flows that have Chat Input and Chat Output components, which are required for the chat experience. Text Input and Text Output components can send and receive messages, but they don't include ongoing LLM chat context.
Attempting to chat with a flow that doesn't have a Chat Input component will trigger the flow, but the response only indicates that the input was empty.
Get an embedded chat widget snippet
To get a flow's embedded chat widget code snippet, do the following:
- In SkillFlaw, open the flow you want to embed.
- Click Share, and then select Embed into site.
- Copy the code snippet and use it in the
<body>of your website's HTML. For more information, see Embed the chat widget with React, Angular, or HTML. - Add the
api_keyprop to ensure the widget has permission to run the flow, as explained in Configure the embedded chat web component.
SkillFlaw now serves a wrapper asset at /skillflaw-embedded-chat.js.
That wrapper loads the embedded widget runtime and registers the skillflaw-chat custom element so your integration code uses SkillFlaw-native names.
For example, the following HTML embeds a chat widget for a Basic Prompting template flow hosted on a SkillFlaw server deployed on ngrok:
_12<html>_12 <head>_12 <script src="https://c822-73-64-93-151.ngrok-free.app/skillflaw-embedded-chat.js"></script>_12 </head>_12 <body>_12 <skillflaw-chat_12 host_url="https://c822-73-64-93-151.ngrok-free.app"_12 flow_id="dcbed533-859f-4b99-b1f5-16fce884f28f"_12 api_key="$SKILLFLAW_API_KEY"_12 ></skillflaw-chat>_12 </body>_12</html>
When this code is deployed to a live site, it renders as a responsive chatbot. If a user interacts with the chatbot, the input triggers the specified flow, and then the chatbot returns the output from the flow run.
Embed the chat widget with React, Angular, or HTML
The following examples show how to use embedded chat widget in React, Angular, and plain HTML.
- React
- Angular
- HTML
To use the chat widget in your React application, create a component that loads the widget script and renders the chat interface:
Start with a wrapper component:
_21// Declaration of the SkillFlaw embedded chat web component_21declare global {_21 namespace JSX {_21 interface IntrinsicElements {_21 "skillflaw-chat": any;_21 }_21 }_21}_21_21// Definition for a React wrapper around the embedded chat widget_21export default function ChatWidget(props) {_21 return (_21 <div className={props.className}>_21 <skillflaw-chat_21 host_url="https://c822-73-64-93-151.ngrok-free.app"_21 flow_id="dcbed533-859f-4b99-b1f5-16fce884f28f"_21 api_key="$SKILLFLAW_API_KEY"_21 ></skillflaw-chat>_21 </div>_21 );_21}
- Place the component anywhere in your code to render the chat widget.
- The documentation site includes a working wrapper at
docs/src/components/ChatWidget/index.tsxthat loads the widget script before rendering the custom element. - Import your React wrapper component to make it available for use on a page:
_10import ChatWidget from '@site/src/components/ChatWidget';
- Render your wrapper component in the desired location on the page:
_10<ChatWidget className="my-chat-widget" />
To use the chat widget in your Angular application, create a component that loads the widget script and renders the chat interface.
In an Angular application, the embedded widget uses a custom web component that you must explicitly allow in your site's .components.ts.
Therefore, to use the embedded chat widget, you must add CUSTOM_ELEMENTS_SCHEMA to your module's configuration, and then integrate the generated custom element.
Angular requires you to explicitly allow custom web components in your site's components.
Therefore, you must add the generated custom element to your Angular template and configure Angular to recognize it.
You must add CUSTOM_ELEMENTS_SCHEMA to your module's configuration to enable this.
-
In your Angular application, edit the
.module.tsfile where you want to add the embedded chat web component. -
At the top of
.module.ts, importCUSTOM_ELEMENTS_SCHEMA:_10import { NgModule, CUSTOM_ELEMENTS_SCHEMA } from '@angular/core'; -
In the
@NgModuledecorator, addCUSTOM_ELEMENTS_SCHEMAto theschemasarray:_16import { NgModule, CUSTOM_ELEMENTS_SCHEMA } from '@angular/core';_16import { BrowserModule } from '@angular/platform-browser';_16import { AppComponent } from './app.component';_16_16@NgModule({_16declarations: [_16AppComponent_16],_16imports: [_16BrowserModule_16],_16schemas: [CUSTOM_ELEMENTS_SCHEMA],_16providers: [],_16bootstrap: [AppComponent]_16})_16export class AppModule { } -
Edit the
.component.tsfile where you want to use the embedded chat widget. -
In the
@Componentdecorator, add the generated custom element to thetemplatekey:_24import { Component } from '@angular/core';_24_24@Component({_24selector: 'app-root',_24template: `_24<div class="container">_24<h1>SkillFlaw Chat Test</h1>_24<skillflaw-chat_24host_url="https://c822-73-64-93-151.ngrok-free.app"_24flow_id="dcbed533-859f-4b99-b1f5-16fce884f28f"_24api_key="$SKILLFLAW_API_KEY"_24></skillflaw-chat>_24</div>_24`,_24styles: [`_24.container {_24padding: 20px;_24text-align: center;_24}_24`]_24})_24export class AppComponent {_24title = 'SkillFlaw Chat Test';_24}
_12<html lang="en">_12<head>_12<script src="https://c822-73-64-93-151.ngrok-free.app/skillflaw-embedded-chat.js"></script>_12</head>_12<body>_12<skillflaw-chat_12 host_url="https://c822-73-64-93-151.ngrok-free.app"_12 flow_id="dcbed533-859f-4b99-b1f5-16fce884f28f"_12 api_key="$SKILLFLAW_API_KEY"_12 ></skillflaw-chat>_12</body>_12</html>
Configure the embedded chat web component
To use the embedded chat widget in your HTML, the current web component must include the following minimum inputs (also known as props in React):
host_url: Your SkillFlaw server URL. UseHTTPSfor any browser deployment outside local development, and don't include a trailing slash (/).flow_id: The ID of the flow you want to embed.api_key: A SkillFlaw API key. This prop is recommended to ensure the widget has permission to run the flow.
The minimum inputs are automatically populated in the Embed into site code snippet that is generated by SkillFlaw.
You can use additional inputs (props) to modify the embedded chat widget.
The generated Embed into site snippet is the source of truth for the currently supported attributes, and the skillflaw-chat wrapper forwards those attributes to the embedded runtime.
Example: SkillFlaw API key prop
The api_key prop stores a SkillFlaw API key that the chat widget can use to authenticate the underlying SkillFlaw API request.
The SkillFlaw team recommends following industry best practices for handling sensitive credentials. For example, securely store your API key, and then retrieve with an environment variable:
_10<skillflaw-chat_10 host_url="https://c822-73-64-93-151.ngrok-free.app"_10 flow_id="dcbed533-859f-4b99-b1f5-16fce884f28f"_10 api_key="$SKILLFLAW_API_KEY"_10></skillflaw-chat>
Example: Style props
There are many props you can use to customize the style and positioning of the embedded chat widget. Many of these props are of type JSON, and they require specific formatting, depending on where you embed the widget web component.
In React and plain HTML, JSON props are expressed as JSON objects or stringified JSON, such as \{"key":"value"\}:
_17<skillflaw-chat_17 host_url="https://c822-73-64-93-151.ngrok-free.app"_17 flow_id="dcbed533-859f-4b99-b1f5-16fce884f28f"_17 api_key="$SKILLFLAW_API_KEY"_17 chat_window_style='{_17 "backgroundColor": "#1a0d0d",_17 "border": "4px solid #b30000",_17 "borderRadius": "16px",_17 "boxShadow": "0 8px 32px #b30000",_17 "color": "#fff",_17 "fontFamily": "Georgia, serif",_17 "padding": "16px"_17 }'_17 window_title="Custom Styled Chat"_17 height="600"_17 width="400"_17 ></skillflaw-chat>
For Angular applications, use property binding syntax to pass JSON props as JavaScript objects. For example:
_30import { Component } from '@angular/core';_30_30@Component({_30 selector: 'app-root',_30 template: `_30 <div class="container">_30 <h1>SkillFlaw Chat Test</h1>_30 <skillflaw-chat_30 host_url="https://c822-73-64-93-151.ngrok-free.app"_30 flow_id="dcbed533-859f-4b99-b1f5-16fce884f28f"_30 api_key="$SKILLFLAW_API_KEY"_30 [chat_window_style]='{"backgroundColor": "#ffffff"}'_30 [bot_message_style]='{"color": "#000000"}'_30 [user_message_style]='{"color": "#000000"}'_30 height="600"_30 width="400"_30 chat_position="bottom-right"_30 ></skillflaw-chat>_30 </div>_30 `,_30 styles: [`_30 .container {_30 padding: 20px;_30 text-align: center;_30 }_30 `]_30})_30export class AppComponent {_30 title = 'SkillFlaw Chat Test';_30}
Example: Session ID prop
The following example adds a custom session ID to help identify flow runs started by the embedded chat widget:
_10<skillflaw-chat_10 host_url="https://c822-73-64-93-151.ngrok-free.app"_10 flow_id="dcbed533-859f-4b99-b1f5-16fce884f28f"_10 api_key="$SKILLFLAW_API_KEY"_10 session_id="$SESSION_ID"_10></skillflaw-chat>
Example: Tweaks prop
Use the tweaks prop to modify flow parameters at runtime.
The available keys for the tweaks object depend on the flow you are serving through the embedded chat widget.
In React and plain HTML, tweaks are declared as a JSON object, similar to how you would pass them to a SkillFlaw API endpoint like /api/v1/run/$FLOW_ID.
For example:
_10<skillflaw-chat_10 host_url="https://c822-73-64-93-151.ngrok-free.app"_10 flow_id="dcbed533-859f-4b99-b1f5-16fce884f28f"_10 api_key="$SKILLFLAW_API_KEY"_10 tweaks='{_10 "model_name": "llama-3.1-8b-instant"_10 }'_10></skillflaw-chat>
For Angular applications, use property binding syntax to pass JSON props as JavaScript objects. For example:
_25import { Component } from '@angular/core';_25_25@Component({_25 selector: 'app-root',_25 template: `_25 <div class="container">_25 <h1>SkillFlaw Chat Test</h1>_25 <skillflaw-chat_25 host_url="https://c822-73-64-93-151.ngrok-free.app"_25 flow_id="dcbed533-859f-4b99-b1f5-16fce884f28f"_25 api_key="$SKILLFLAW_API_KEY"_25 [tweaks]='{"model_name": "llama-3.1-8b-instant"}'_25 ></skillflaw-chat>_25 </div>_25 `,_25 styles: [`_25 .container {_25 padding: 20px;_25 text-align: center;_25 }_25 `]_25})_25export class AppComponent {_25 title = 'SkillFlaw Chat Test';_25}
Serve flows through a SkillFlaw MCP server
SkillFlaw exposes eligible flows through MCP servers so that MCP clients can use those flows as tools when generating responses.
In addition to serving flows through SkillFlaw MCP servers, you can use SkillFlaw as an MCP client to access any MCP server, including your SkillFlaw MCP servers.
In the current backend implementation, MCP traffic is exposed through the SkillFlaw API under /api/v1/mcp/*, including the streamable endpoint at /api/v1/mcp/streamable.
For more information, see Use SkillFlaw as an MCP server and Use SkillFlaw as an MCP client.
Run flows with the OpenAI Responses compatible endpoint
SkillFlaw includes an OpenAI Responses API-compatible endpoint at /api/v1/responses that allows you to use existing OpenAI client libraries and code with minimal modifications.
For more information, see OpenAI Responses API.