Workflow manual
This page documents the workflow management experience exposed to users in SkillFlaw. It covers the three top-level tabs and the workflow creation dialogs available in the product interface.
Entry points
Users enter this module through Resources > Workflow. The list page is organized into three top-level tabs:
- Workflow Development
- Workflow Plaza
- Template Plaza
Real interface screenshots
Workflow Development tab

This is the main management surface for workflows within the selected scope. The captured screen shows:
- the scope indicator, which is Personal in this example
- workflow type, organization, status, access type, and keyword filters
- the Create Workflow card
- the real empty state when no workflow matches the selected filters
Create blank workflow dialog
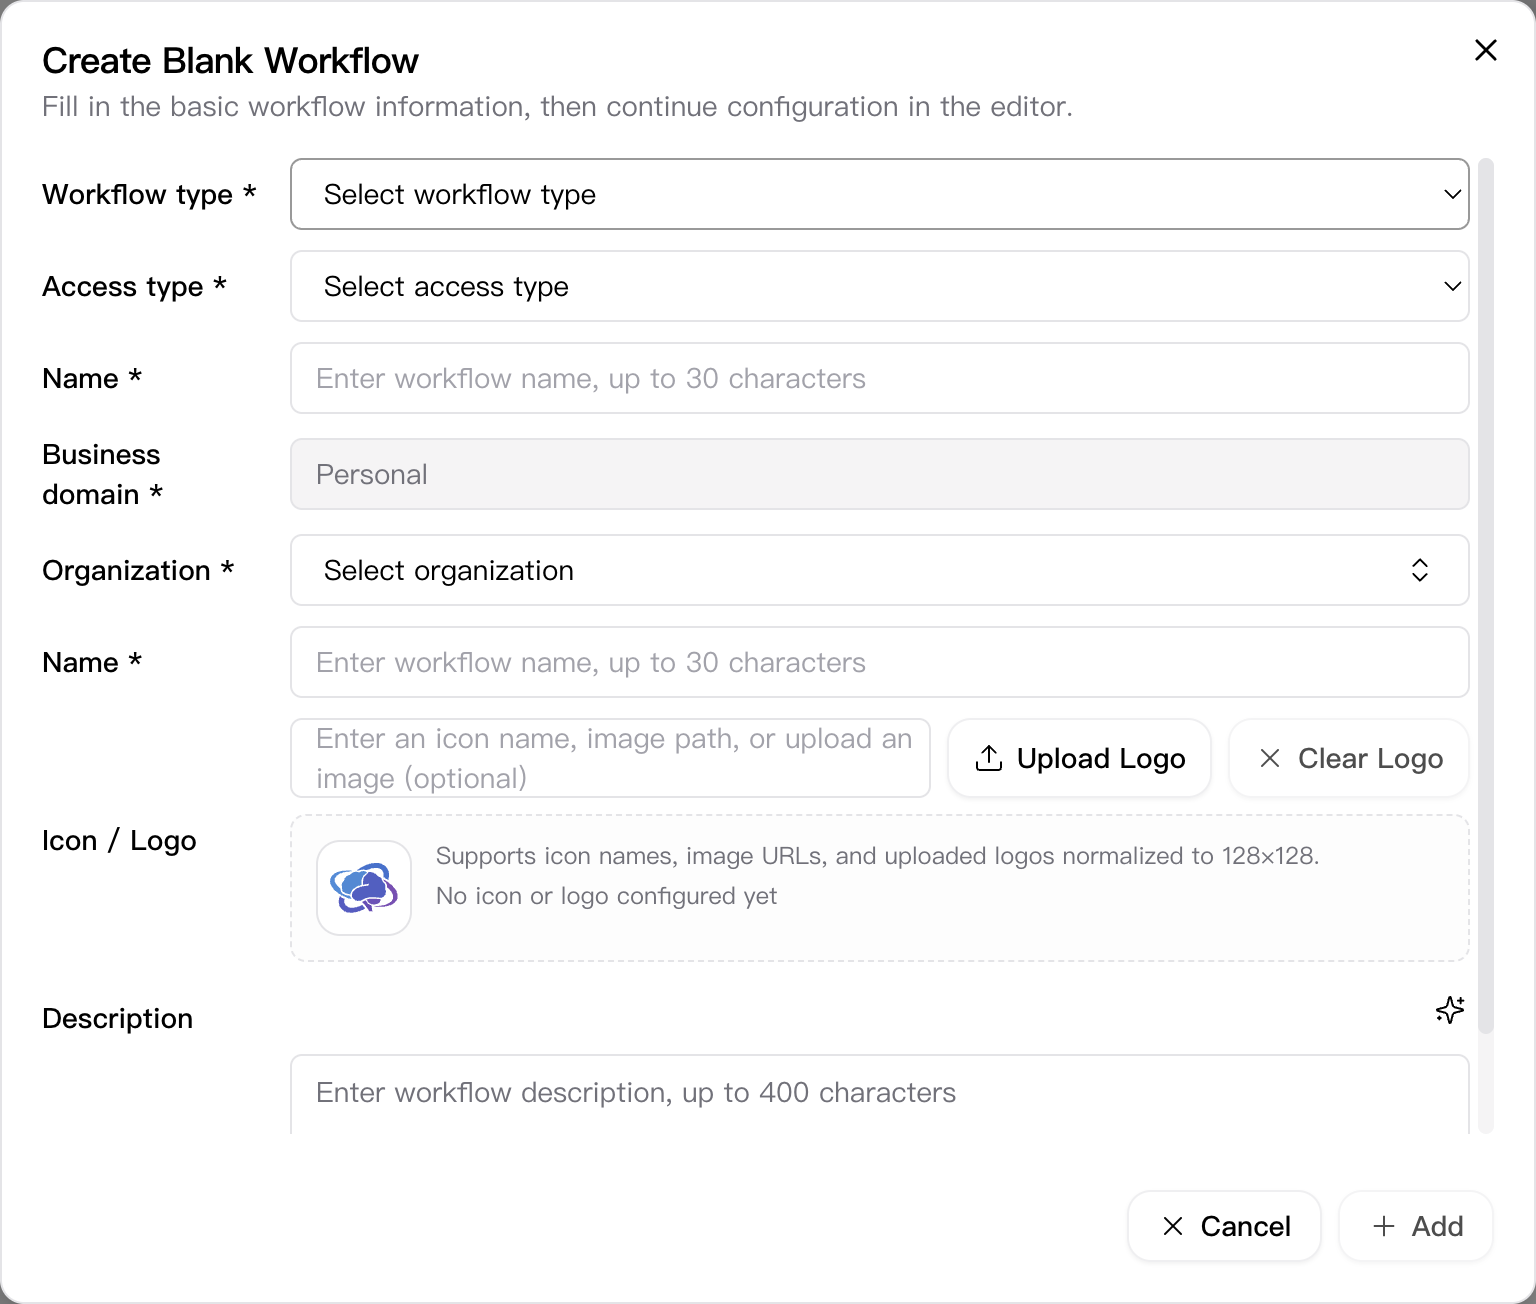
The create-blank dialog is a dedicated modal. The dialog includes these visible inputs:
- Workflow type
- Access type
- Workflow name
- Business domain
- Organization
- Icon
- Description
Observed behavior:
- in personal context, the business field is fixed to Personal
- organization is required and does not expose an “all” option
- description supports AI-assisted draft generation
- after creation, the workflow editor opens in a new tab
Create from template dialog
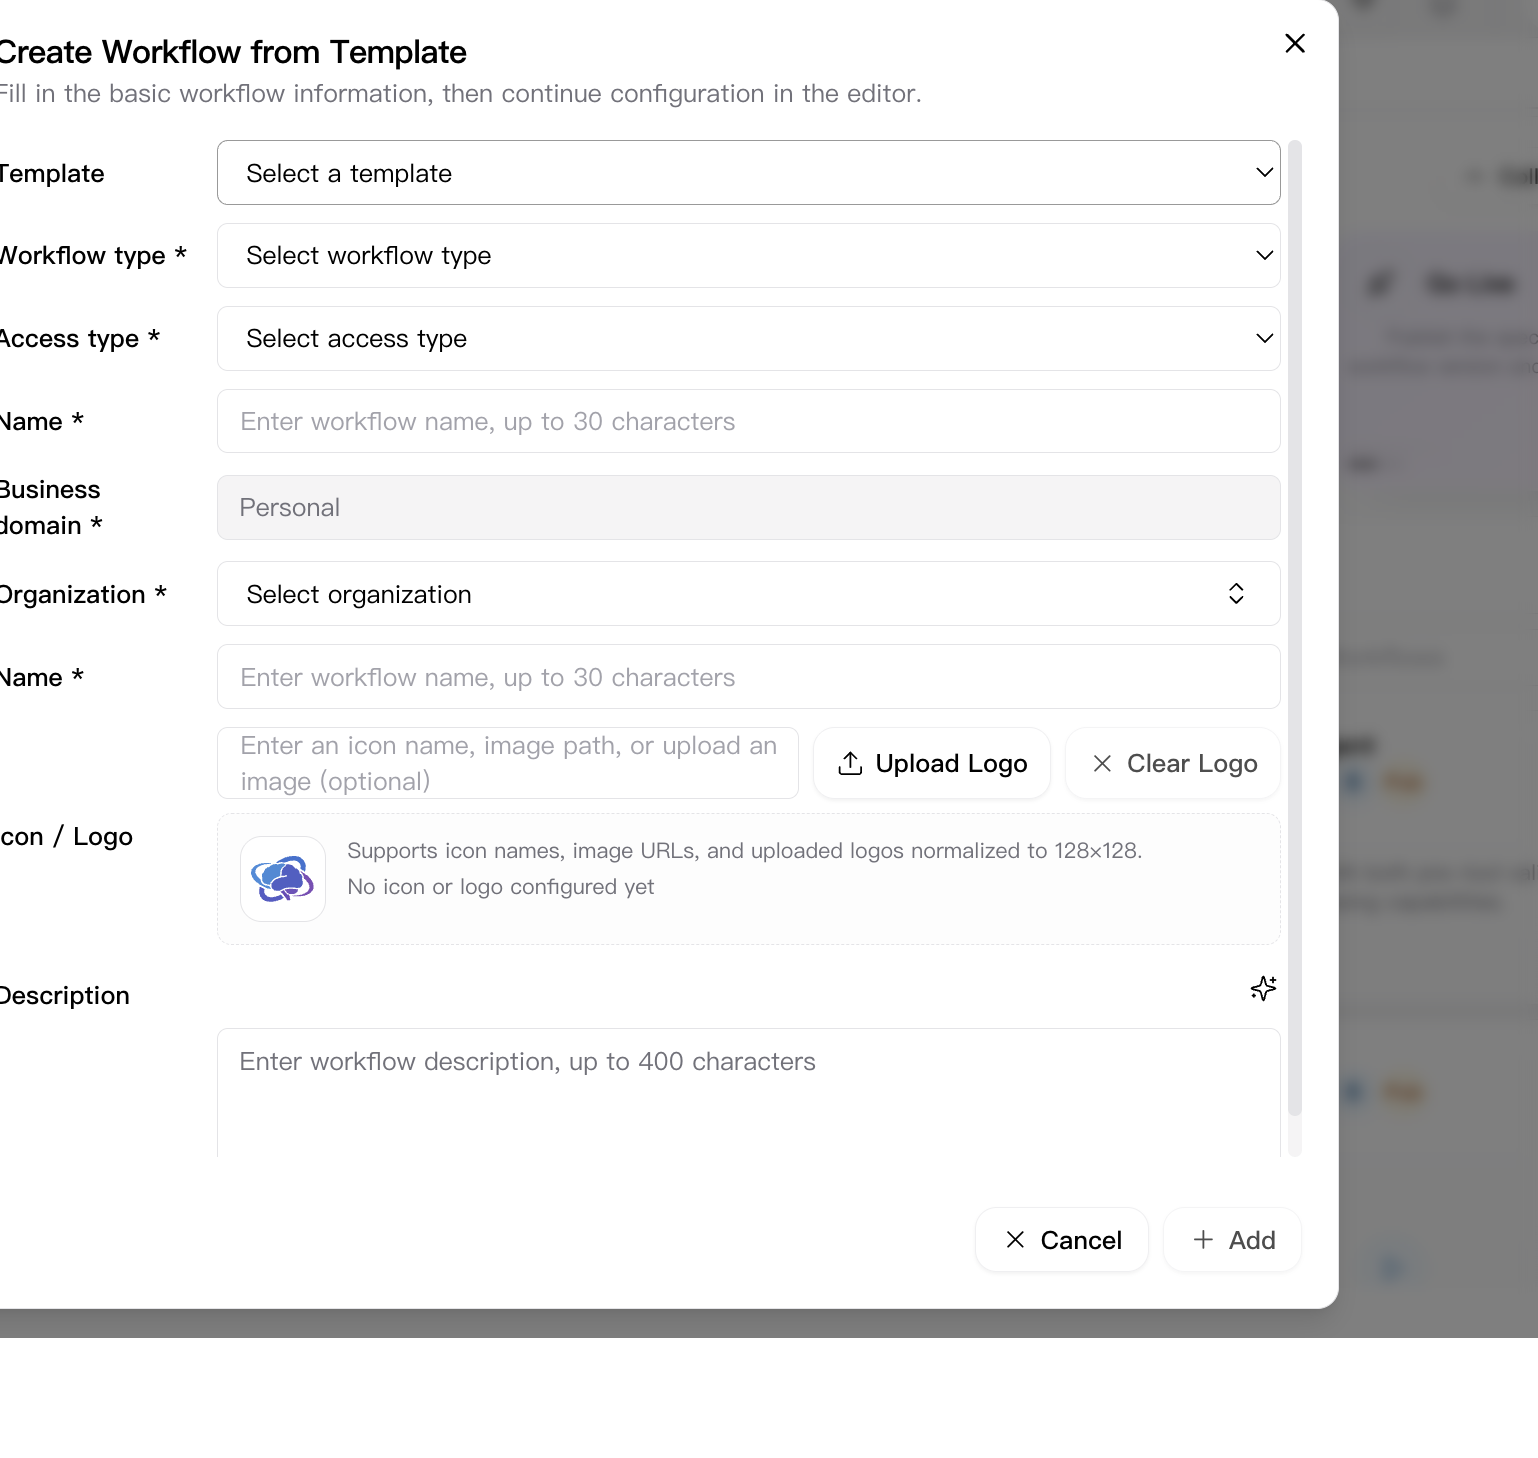
Template creation reuses the same base form, but adds a required Template selector. The selected template can prefill data such as the workflow type and icon before the workflow is created.
Workflow Plaza tab
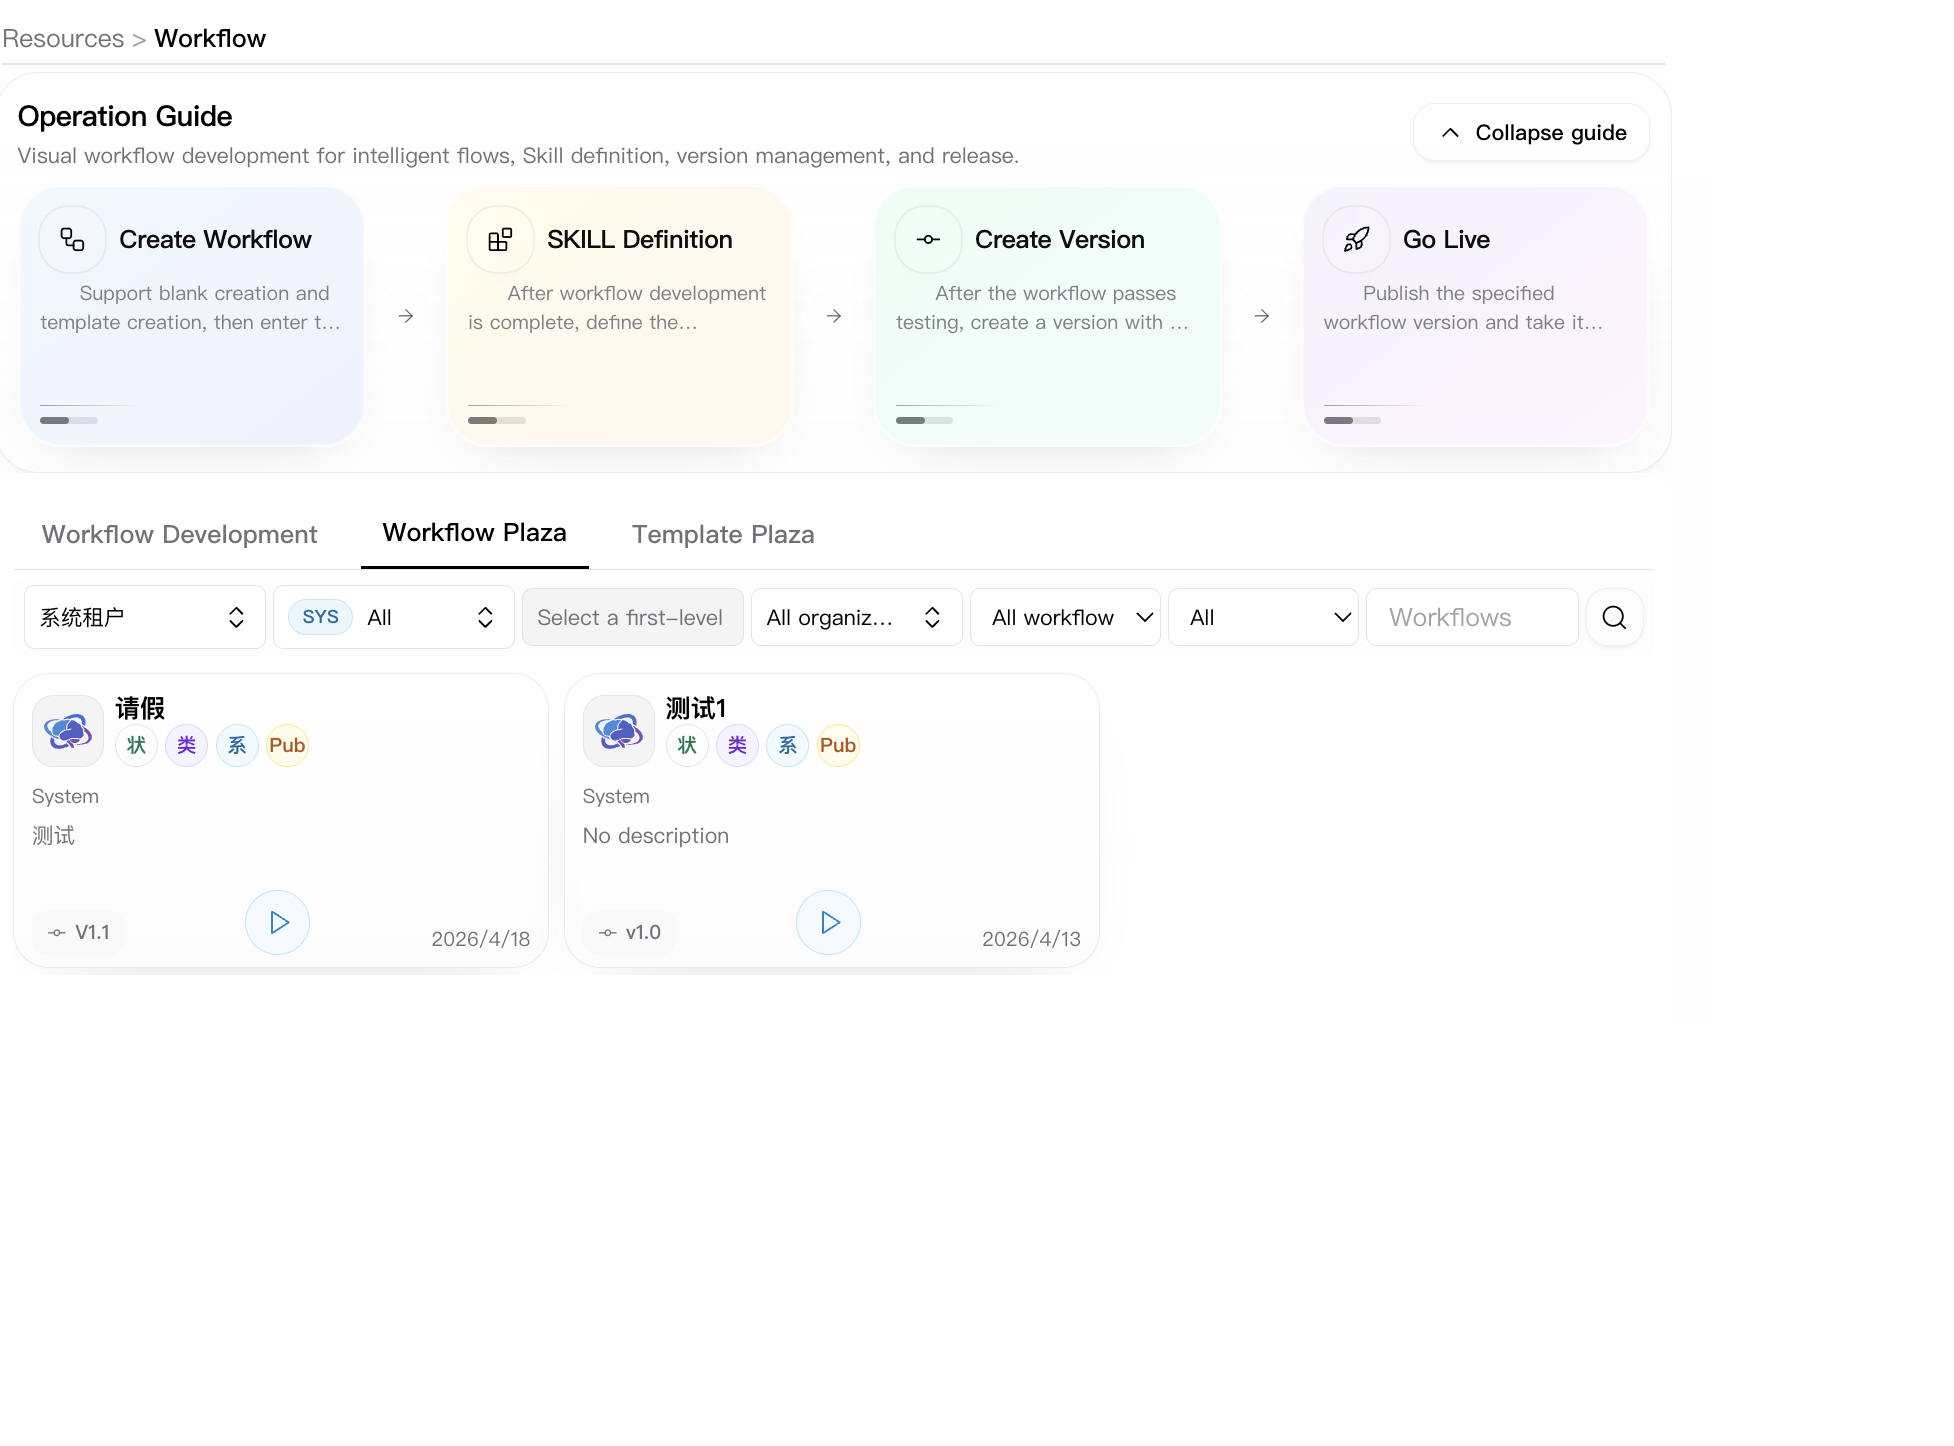
The plaza tab is the discovery surface for readable workflows across wider scopes. The page exposes:
- tenant selector
- scope selector
- sub-business selector when business scope is chosen
- organization, workflow type, access type, and keyword filters
- workflow cards from the readable plaza scope
Template Plaza tab
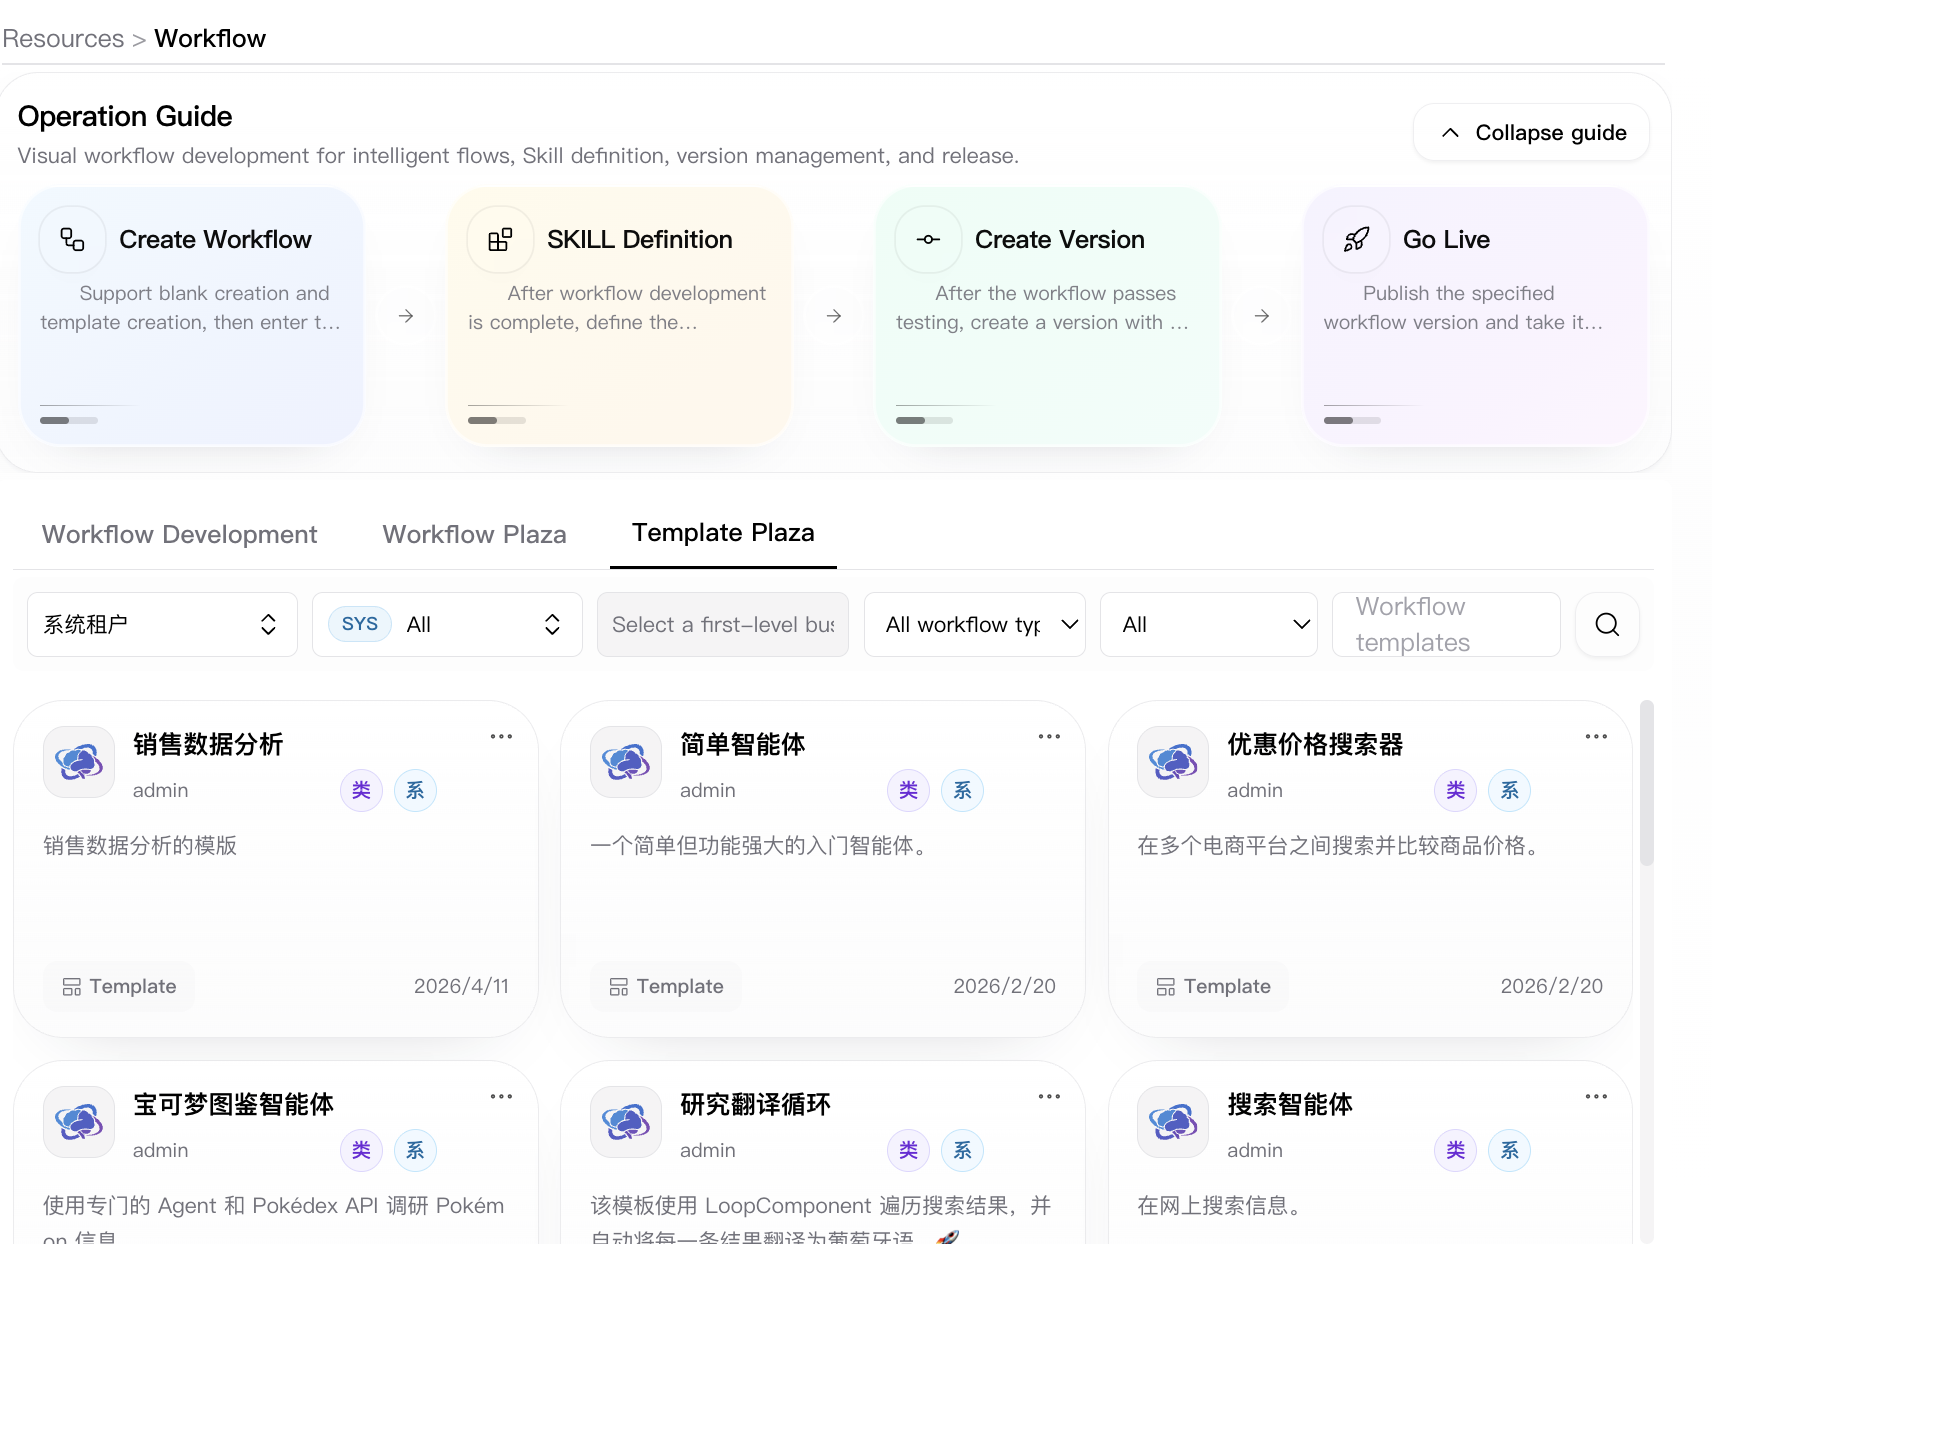
The template plaza is the browsing surface for reusable workflow templates.
Workflow detail page
Open any workflow from Workflow Development or Workflow Plaza to enter the workflow detail page. This page is the resource-level workspace for reviewing workflow metadata, maintaining the workflow skill content, checking historical versions, inspecting API invocation information, and tracing runtime logs.
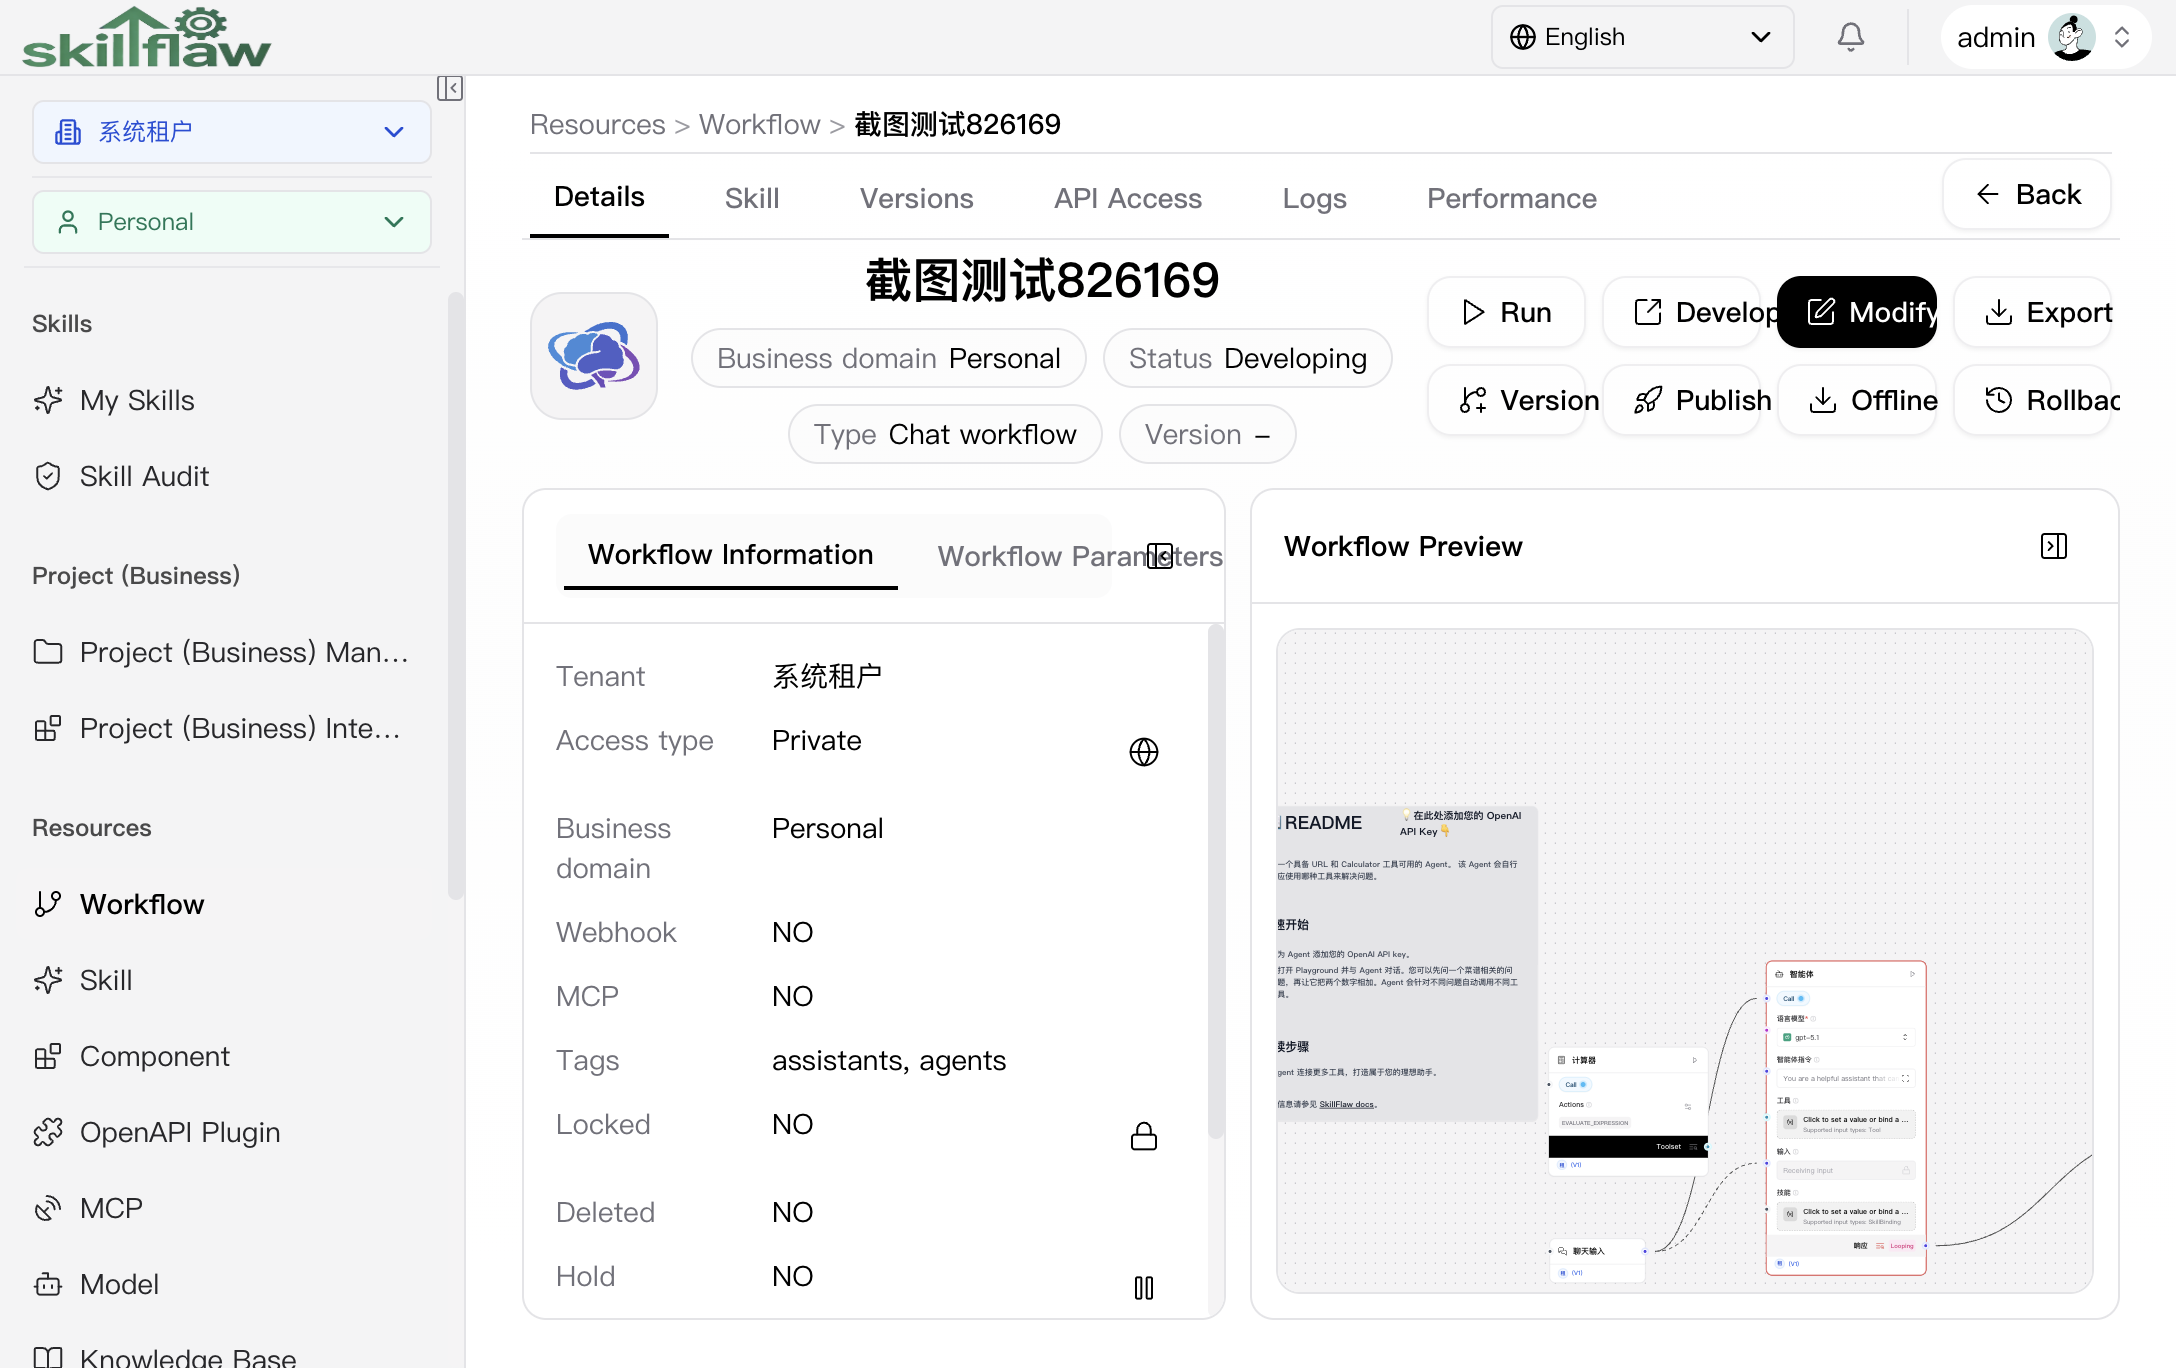
The screenshot above shows the complete workflow detail page in its default Details state, including the global navigation area, page header actions, metadata panel, and workflow preview canvas.
Details tab
The Details tab is the default landing view after opening a workflow. The real page combines a summary header, a metadata panel, and a read-only workflow preview.
Visible areas and actions on this tab include:
- the breadcrumb path and Back action for returning to the workflow list
- workflow title, business domain, current status, workflow type, and released version information
- primary actions such as Run, Develop, Modify, and Export
- lifecycle actions such as Version, Publish, Offline, and Rollback
- a left-side information panel with two inner tabs: Workflow Information and Workflow Parameters
- a right-side Workflow Preview canvas for reviewing the current orchestration visually
The Workflow Information panel exposes the current resource fields shown on the page, including:
- Tenant
- Access type
- Business domain
- Webhook
- MCP
- Tags
- Locked
- Deleted
- Hold
- Endpoint
- Remarks
The Workflow Parameters inner tab is used to inspect the arguments defined for the workflow itself.
Skill tab
The Skill tab is used to maintain the workflow's skill markdown. This page supports both direct editing and AI-assisted generation.
Users can:
- switch between raw markdown and rendered preview
- edit the current workflow skill content
- save or cancel local edits
- click Auto Generate to let AI produce a draft skill description
When AI generation is running, the page displays an in-progress status and a continued-waiting status for slower requests. The generated result is inserted as a draft first, so the user can review and save it explicitly.
Versions tab
The Versions tab is used to inspect and operate on historical workflow versions. The page contains a version selector and a version header panel before showing the read-only content area.
The header area exposes these fields for the selected version:
- Access type
- Version
- Creator
- Created at
- Hold
- Version note
The same area also exposes version-level actions such as:
- Go Online
- Go Offline
- Hold or Release Hold
- Test
Below the header, the page splits into two panels:
- the left panel provides Workflow Information and Workflow Args views for the selected version
- the right panel provides Workflow Preview and Skill views for the selected version
From this tab, users can also export the selected version as DSL JSON or Skill Markdown.
API Access tab
The API Access tab is the integration entry for invoking the workflow outside the editor. It separates the invocation information into three environments:
- Developing
- Published
- Release
For each environment, the page shows:
- the request URL for that environment
- runnable code examples in multiple languages
- a Schema dialog entry
The Release environment additionally exposes a version selector so users can switch the released version being inspected.
Inside the Schema dialog, the page shows the Endpoint name and the exposed API schema nodes. In the developing environment, the endpoint name and schema can be edited and saved. In the published and release environments, the same dialog is used as a read-only reference for the online contract.
Logs tab
The Logs tab is the operational trace view for the workflow. It is split into two sub-tabs:
- Access Logs
- Transactions
The Access Logs view supports filtering by:
- workflow version
- start time and end time
- status
- session ID
- sender name
- IP address
The Transactions view supports filtering by:
- workflow version
- status
- start time and end time
- component ID
- component version
Both sub-tabs display structured tables. When a field contains structured content, the user can open a detail viewer to inspect the JSON or text value. From access-log rows, the page can also drill down into the transaction records associated with that message.
Performance tab
The Performance tab reserves a dedicated place for workflow performance information. When no metric content is available, the page shows an empty state instead of fabricating monitoring data.
Workflow Development (Playground)
This section explains the workflow editor (Playground), with emphasis on the left menu bar, the top action strip, the debug entry on the right side of the canvas, and the AI-assisted workflow development flow.
Interface Overview
As shown above, the workflow development interface consists of three main areas:
- Left menu bar: Used to switch between resource sources, search within the active section, and drag nodes onto the canvas.
- Central canvas: Used to build and edit workflows, connect nodes, configure parameters, and review the orchestration visually.
- Top-right operation area: Includes the top action strip and the debug entry on the right side of the canvas for development assistance, version/export actions, saving, and runtime testing.
Left Menu Bar Details
The left menu bar organizes available resources by section. The key entries are:
- Flow Components: The built-in system node catalog. In the interface, this section further exposes groups such as Input/Output, Data Sources, Models & Agent, LLM Operations, Files & Knowledge, Data Processing, Flow Control, Tools, and Knowledge Base.
- Business Components: Business-side reusable components. This area also exposes actions such as Discover business components and New Custom Component for expanding the available catalog.
- Workflows: Reuse another workflow as a node or referenced function inside the editor.
- MCP: Insert authorized MCP resources and tools into the workflow.
- Skills: Reuse skill resources inside the workflow canvas.
- Knowledge Base: Attach knowledge-base resources for retrieval, Q&A, or knowledge-enhanced flows.
- Plugins: Insert OpenAPI plugin tools to connect the workflow with external systems.
At the top of the resource area, users can search within the active section. In sections that support scope control, tenant and scope selectors are also available to narrow visible candidates. After locating a resource, drag it to the canvas to start composing the workflow.
Top Action Strip and Debug Entry
The top-right operation area is split into two parts:
- Default actions in the top action strip:
- AI Develop: Opens the AI workspace to help generate a workflow draft from requirements.
- Version: Opens the version menu for actions such as create version, rollback version, and publish version.
- Export: Opens the export menu for actions such as export DSL, export plugin, export OpenAPI definition, or embed into a website.
- Expanded actions in the top action strip:
- Workflow Args: Maintain the workflow argument definitions.
- Component Upgrade: Open the component-upgrade entry.
- Save: Save the editor state.
- Create Template: Turn the workflow being edited into a reusable template.
- API Access: Open the API access entry for invocation and integration details.
- Debug entry on the right side of the canvas: The separate Debug button opens the runtime debugging panel so the workflow can be tested without leaving the editor.
AI-Powered Workflow Development
AI development is one of the fastest ways to start a workflow on this page. The process is:
- Step 1: Describe the requirement. Click AI Develop to open the AI workspace and describe the business goal, inputs, outputs, constraints, and expected result in natural language.
- Step 2: Review the structured analysis. AI first generates a structured note and a business-process graph instead of directly writing to the canvas.
- Step 3: Answer clarification questions. If the requirement is ambiguous, AI asks follow-up questions one by one before continuing.
- Step 4: Confirm the process. After the process is reviewed and confirmed, AI proceeds to resource matching and draft generation.
- Step 5: Generate and apply the draft. AI produces a workflow draft, together with a summary, explanation, key points, risks, and a confirmation checklist. The user can then apply the draft to the canvas.
- Step 6: Save the result. After the draft is applied, the final workflow still needs to be saved explicitly from the page actions.
The AI workspace also keeps the processing stage, progress, history, and next-step guidance visible, which makes it suitable for iterating on more complex business flows instead of building everything manually from scratch.
Common operations
Create a blank workflow
- Open Workflow Development.
- Click Create blank workflow.
- Fill in the required workflow fields.
- Confirm and continue into the editor opened in a new tab.
Create from a template
- Open Workflow Development.
- Click Create from template.
- Choose a template and complete the remaining required fields.
- Confirm and continue into the generated workflow editor.
Browse readable workflows
Use Workflow Plaza to filter workflows by tenant, scope, organization, type, access type, or keyword. This tab is designed for discovery and cross-scope browsing rather than direct authoring within the selected scope.
Browse reusable templates
Use Template Plaza to inspect template candidates before creating a workflow from them. The page separates template browsing from normal workflow browsing, which keeps the two resource types distinct.